Conversion to XFEM
1.0 Introduction
This tutorial shows how to convert the current jointed model into XFEM. The model was built in four stages. In the first stage the model is under equilibrium and joints do not have any initial deformation, while in the second stage the excavation above the slope is applied and the water table is lowered. The concrete is poured on the excavated zone in the third stage and finally the bolts are installed in the fourth stage to increase the strength of the soil.

2.0 Constructing the Model
- Select File > Recent Folders > Tutorial Folder > Jointed Rock
- Select XFEM conversion initial
- Select Analysis > Project Settings

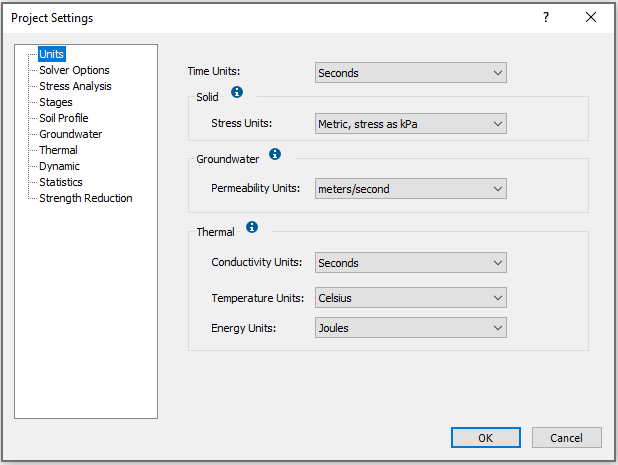
In the Project Settings dialog select Units tab and ensure that stress units are set to Metric, stress as kPa.

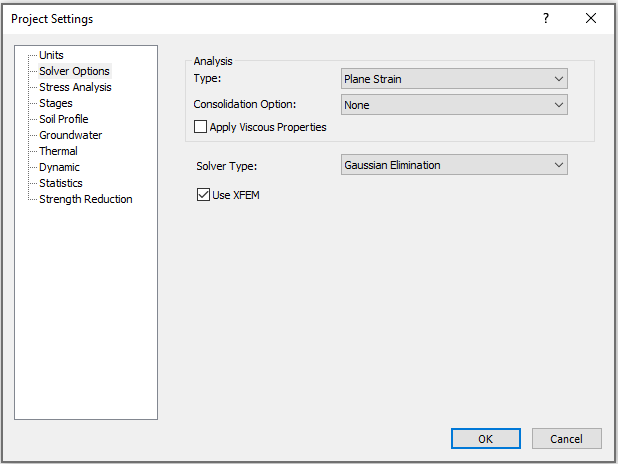
Select Solver Options tab. Select the checkbox for Use XFEM.

- By clicking Ok, the initial mesh assignment would disappear.
Begin by importing a file created by explicit joints, in which geometry, mesh, materials, and boundary conditions in all stages have already been assigned. Since the construction and assignment of piezometric lines, bolts and boundary conditions are already covered in the other tutorials, here, we skip them and only focus on the XFEM conversion.
2.1 MESH

- Select Mesh > Mesh Setup

- Use Uniform mesh in the Mesh Type section.
- Pick 6 Noded Triangles as Element Type.
- Enter the Approximate Number of Mesh Elements as 1500.
- Select Discretize, then select Mesh.
- Select OK to close the dialog.

The finished model should appear:

3.0 Compute
- Select: Analysis > Compute

4.0 Results and Discussion
- Select: Analysis > Interpret

4.1 CONTOURS OF MAJOR PRINCIPAL STRESS – SIGMA 1
The maximum compressive stress (sigma 1) would be displayed.
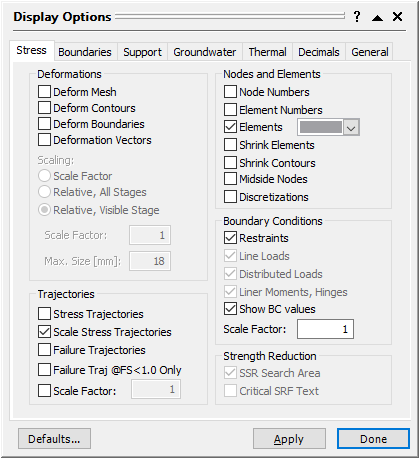
- Right click on the screen, select Display Options

- Under Nodes and Elements section of Stress tab, select the checkbox for Elements. Mesh will be displayed.
- Select Done to close the dialog.


As it can be seen in the initial stage, where the slope is under equilibrium, the minimum compressive stress is happening on the free surface of the slope. This value keeps increasing in depth where more weight is applied to the rock mass.
4.2 CONTOURS OF TOTAL DISPLACEMENT
At the top right on the tool bar change Sigma 1 on the drop-down menu to Solid Displacement > Total Displacement. In order to compare the obtained XFEM results with regular joint, the similar simulation is repeated for the latter without XFEM (explicit) and the total displacement at each stage is displayed here. The explicit model is included in the tutorial folder with filename: XFEM conversion (explicit) under File > Recent Folders > Tutorial Folder > Jointed Rock.

Stage 1 (left) XFEM (right) explicit joint network

Stage 2 (left) XFEM (right) explicit joint network

Stage 3 (left) XFEM (right) explicit joint network

Stage 4 (left) XFEM (right) explicit joint network
As it can be seen, the results are in a very good comparison. The slight difference is conducted by different mesh sizes that is imposed in each of these models.
4.3 VISUALIZING JOINT DATA
- Select: Analysis > Show Values

- Pick Joint and select Shear Displacement on drop down menu.
- By clicking OK, the curves on all joints in the model would appear that shows the shear displacement along the joint.
These curves are also compared in last stage with explicit method which are in close agreement.
