Block Model Overview
The Block Model feature allows block model data to be imported and integrated into RS3 projects. This functionality enables the definition of subsurface properties by importing block models generated in programs like Leapfrog, Deswik, Vulcan, Datamine, and others.
Fundamentally, the Import Block Model function translates the geological information, stored as point cloud data in a block model, into an RS3 project. This function also supports the geomechanical properties recorded in each block in the database. Within certain geomechanical parameters, RS3 can read the values recorded in each block.
With this capability, many operations for creating geometries could be eliminated allowing for direct application of material parameters at the block scale. The process of creating complex boundaries within the model is simplified, reducing the challenges associated with 3D geometry creation. Users can easily relocate the geometry within the block model coverage area and update properties automatically, preventing the need to re-create geological boundaries at the new location. Material properties can now be defined per block, so users no longer have to compromise on geological unit simplification.
1. The X, Y, and Z coordinates of each block's center or corners at consistent spacing along all coordinates
2. Rock/soil type or geological units, referred as material ID
Additionally, elastic and strength properties can also be included (See Block Model Material Properties section). Based on this information, RS3 intelligently forms a 3D grid with following predefined geometrical rules Blocks must be cuboidal with consistent dimensions arranged in a 3D rectangular grid.
Two types of material classes are incorporated with block models in RS3:
- Master Material: a host material of a block model, containing the block data information; and
- Child Material: representing the materials specified in the block model database. Materials corresponding with the material ID in the database are automatically added to the RS3 project once the block model is successfully imported.
For more details on their roles, refer to the Block Model Material Properties section. All other material properties are referred as non-block material.
Following steps outlines the general work flow of integrating block model into your project:
- Select Analysis > Project Settings > Units to ensure the project's unit system aligns with that used in the block model.
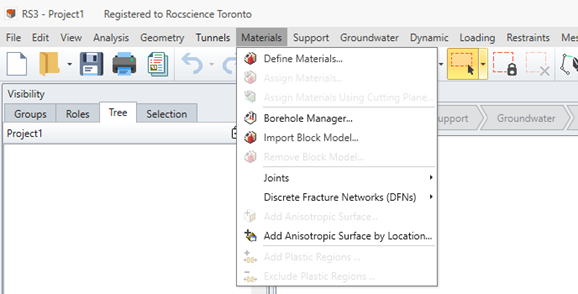
- Select Material > Import Block Model to initialize the import process.

- Proceed with the instructions provided by the Import Block Model wizard. For more details, refer to the Import Block Model Database section, which covers the import process and database requirements.
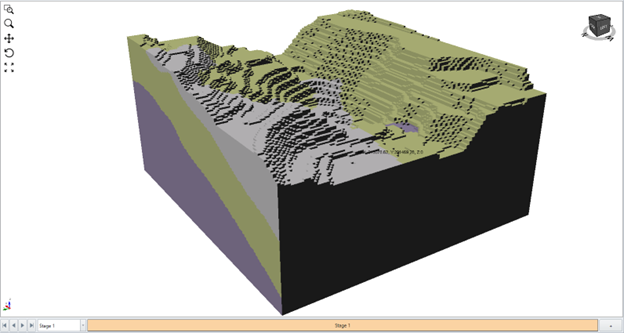
- Once import process completes, RS3 will generate the block model geometry entity (the image below is captured with the block model geometry transparency set to 0).

- Open material dialog (Materials > Define Materials ...) to confirm if Master material and Child materials are properly imported. For more details, refer to the Block Model Material Properties section.
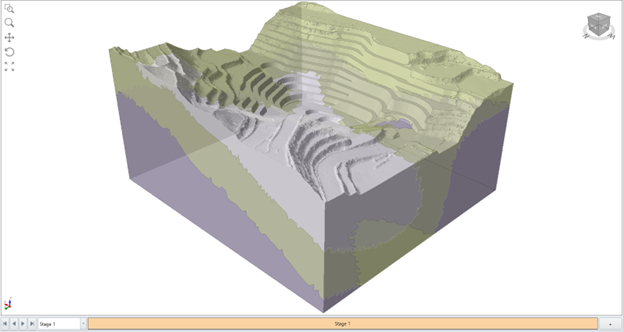
- Import or create a 3D volumetric geometry for finite element analysis, and apply the Master Material to define its properties. The external geometry will be color-coded according to the Child Material, based on the alignment between the geometry’s triangulation and blocks.

- At any point, when the block data needs to be updated or corrected, re-import the block model by selecting Materials > Import Block Model and to remove the block model, select Materials > Remove Block Model.