3D Geometry Import
1.0 Introduction
RS3 supports the import of model geometry from many different file formats mentioned in Import/Export Geometry.
We will cover the following geometry features in this tutorial:
- A Usage Selection screen to guide the initial assignment of geometry type (i.e. Geology / Construction, Surface / Volume, etc).
- Improved geometry selection and filtering options.
- A Geometry Repair feature, to automatically detect and repair problems such as holes, narrow triangles, near degenerate features, self-intersections and non-manifold geometry.
2.0 Importing Geometry
- Select: Geometry > Import/Export > Import Geometry or select Import Geometry
 from the toolbar.
 - Navigate to the directory where tutorials are installed (ex. C:\Users\Public\Documents\Rocscience\RS3 Examples\Tutorials\3D Geometry Import - starting file) and open the file pit_with_defects.stl.
3.0 Geometry Selection
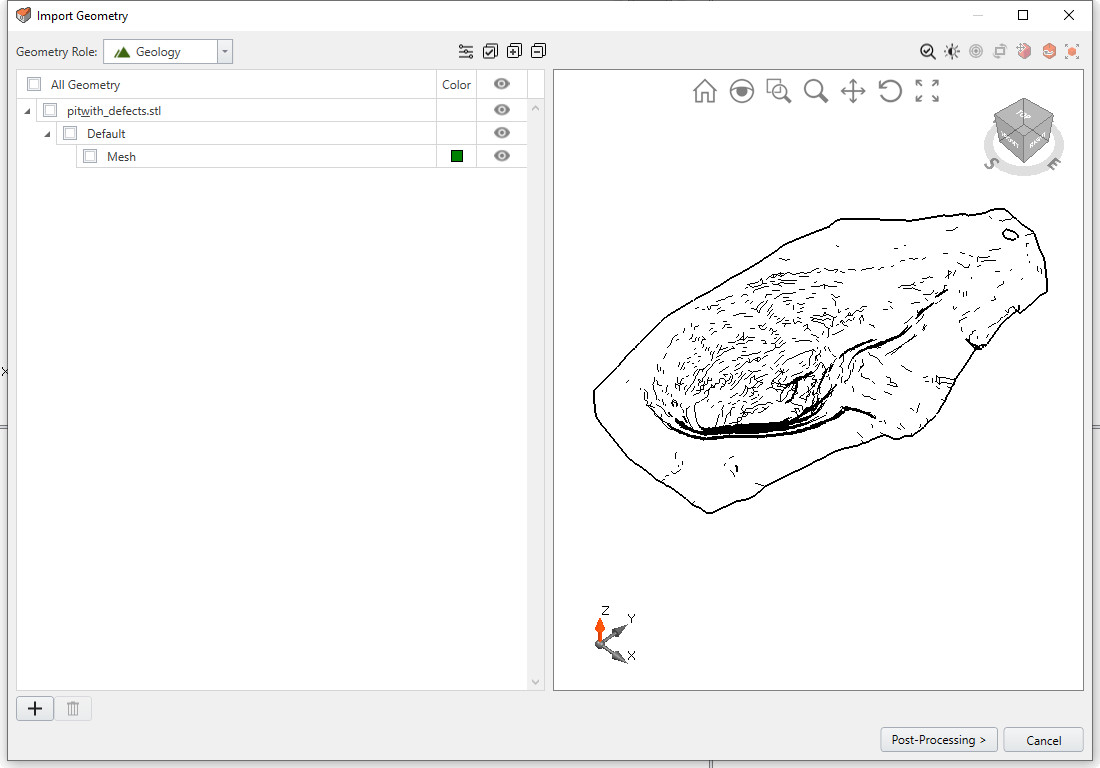
The next step in geometry import is geometry selection. This step encourages you to examine the geometry in the file(s) and select the pieces of geometry for use in a Rocscience model.

Key features include:
- Import multiple files in one session
- Explicit list of selected geometry
- Filter capability to help you find pieces of geometry
- Duplicate removal. Selection by mouse swept box only selects one copy of a piece of geometry that has multiple copies
- Basic transformation functions (Move to Origin, Orientation, Translate, Rotate, Scale)
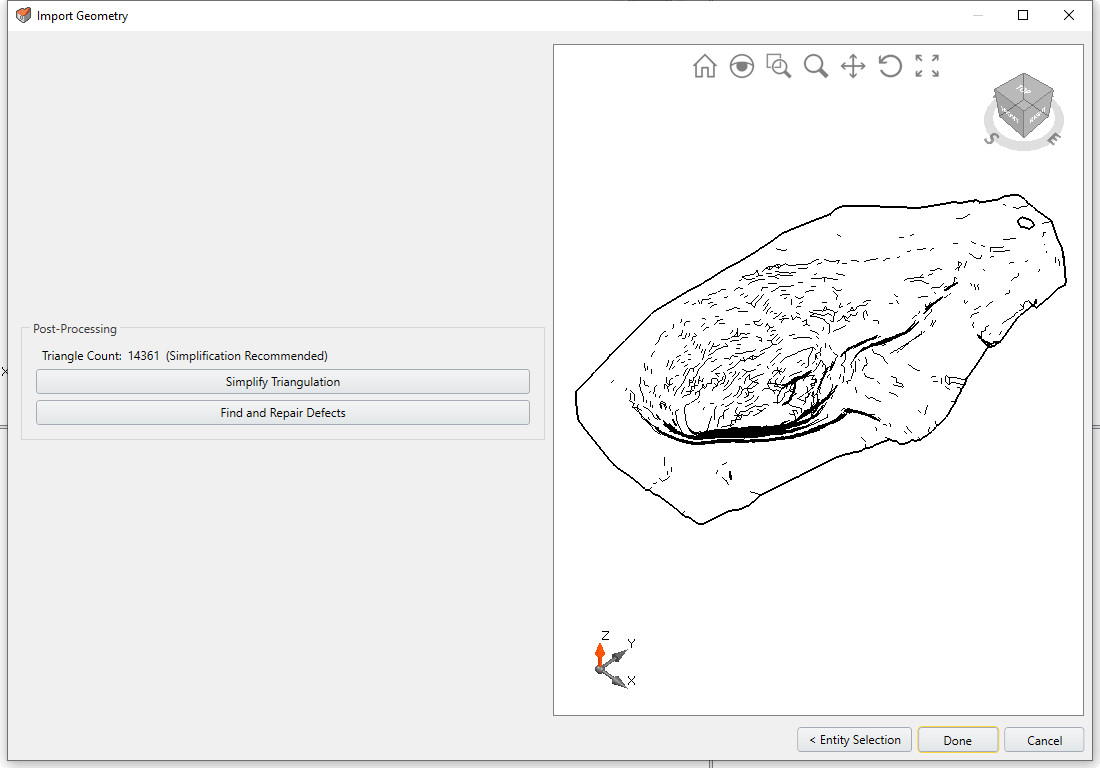
- This example only contains one geometry entity. Select either the file, the Default layer or the Mesh entity (since there is only a single entity it does not matter which you select). Select all boxes of the geometry and click Post-Processing.
You will see two options:
- Simply Triangulation
- Find and Repair Defects

4.0 Geometry Repair
- Click Find and Repair Defects.
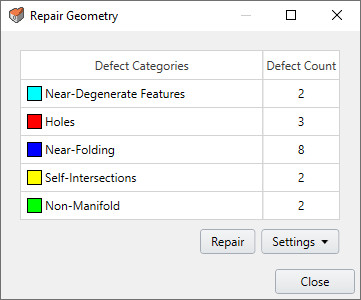
The tool will search the geometry for defects. The more complicated the geometry, the longer this will take. The defects discovered by the validation check will be highlighted on the entity(s) and colour-coded according to defect type.
For this example, the imported surface has geometry defects in all 5 categories, as shown below:

5.0 View Options - Zoom, Pan, Rotate, Magnify
At the top of the geometry viewport on 'Import Geometry' window, you will notice controls for manipulating the view: Home, Magnify, Zoom Window, Zoom, Pan, Rotate, and Zoom Fit, as shown below:

These functions can also be carried out directly using the mouse:
- Rotate mouse wheel to zoom
- Press and hold the mouse wheel to rotate
- Ctrl key + press and hold mouse wheel to pan
- Shift key + press and hold mouse wheel for dynamic zoom
The magnify feature is particularly useful for magnifying details such as highlighted geometry defects in order to assess problem areas.

6.0 Repairing Geometry
- Click the Repair button to automatically repair the geometry.
For more information regarding repair, refer to Geometry Repair Tool. Tutorial for geometry repair feature is available in RS3: Geometry Repair Tool tutorial.
- Click Done to import the geometry.