Intelligent Search
1.0 Introduction
This tutorial will look at Intelligent Search, Slide3’s newest algorithm to identify critical slip surfaces in 3D models.
In Intelligent Search, regions of interest are identified using a new formula for initializing solutions in the search space. Then several “search clusters” are used to search more thoroughly in these regions. As demonstrated in this tutorial, this new algorithm improves search coverage over existing methods and provides the user with more information about their model.
The completed tutorial file is Intelligent search.slide3m2, which can be found in File > Recent Folders > Tutorials Folder.
2.0 Initial Model Setup
Start the Slide3 program. For this tutorial, go to File > Recent Folders > Tutorials Folder and choose Intelligent search - starting file.slide3m2.
2.1 Surface Options
- Go to Surfaces > Slip Surface Options.
- Ensure that the following settings are selected:
- Surface generation method is Classic search.
- Surface shape is Ellipsoid.
- Search method is Particle Swarm Search.
- Number of failures is Multiple.
- Ensure that the Surface Altering Optimization checkbox is OFF.
- Click OK to close the dialog.
2.2 Compute
- Save the model by selecting File > Save As in the menu. Be sure to name it something different so you don’t overwrite the starting file for this tutorial.
- Select Analysis > Compute in the menu to perform the analysis. Depending on your computer’s speed, this may take up to a few minutes.
2.3 Result
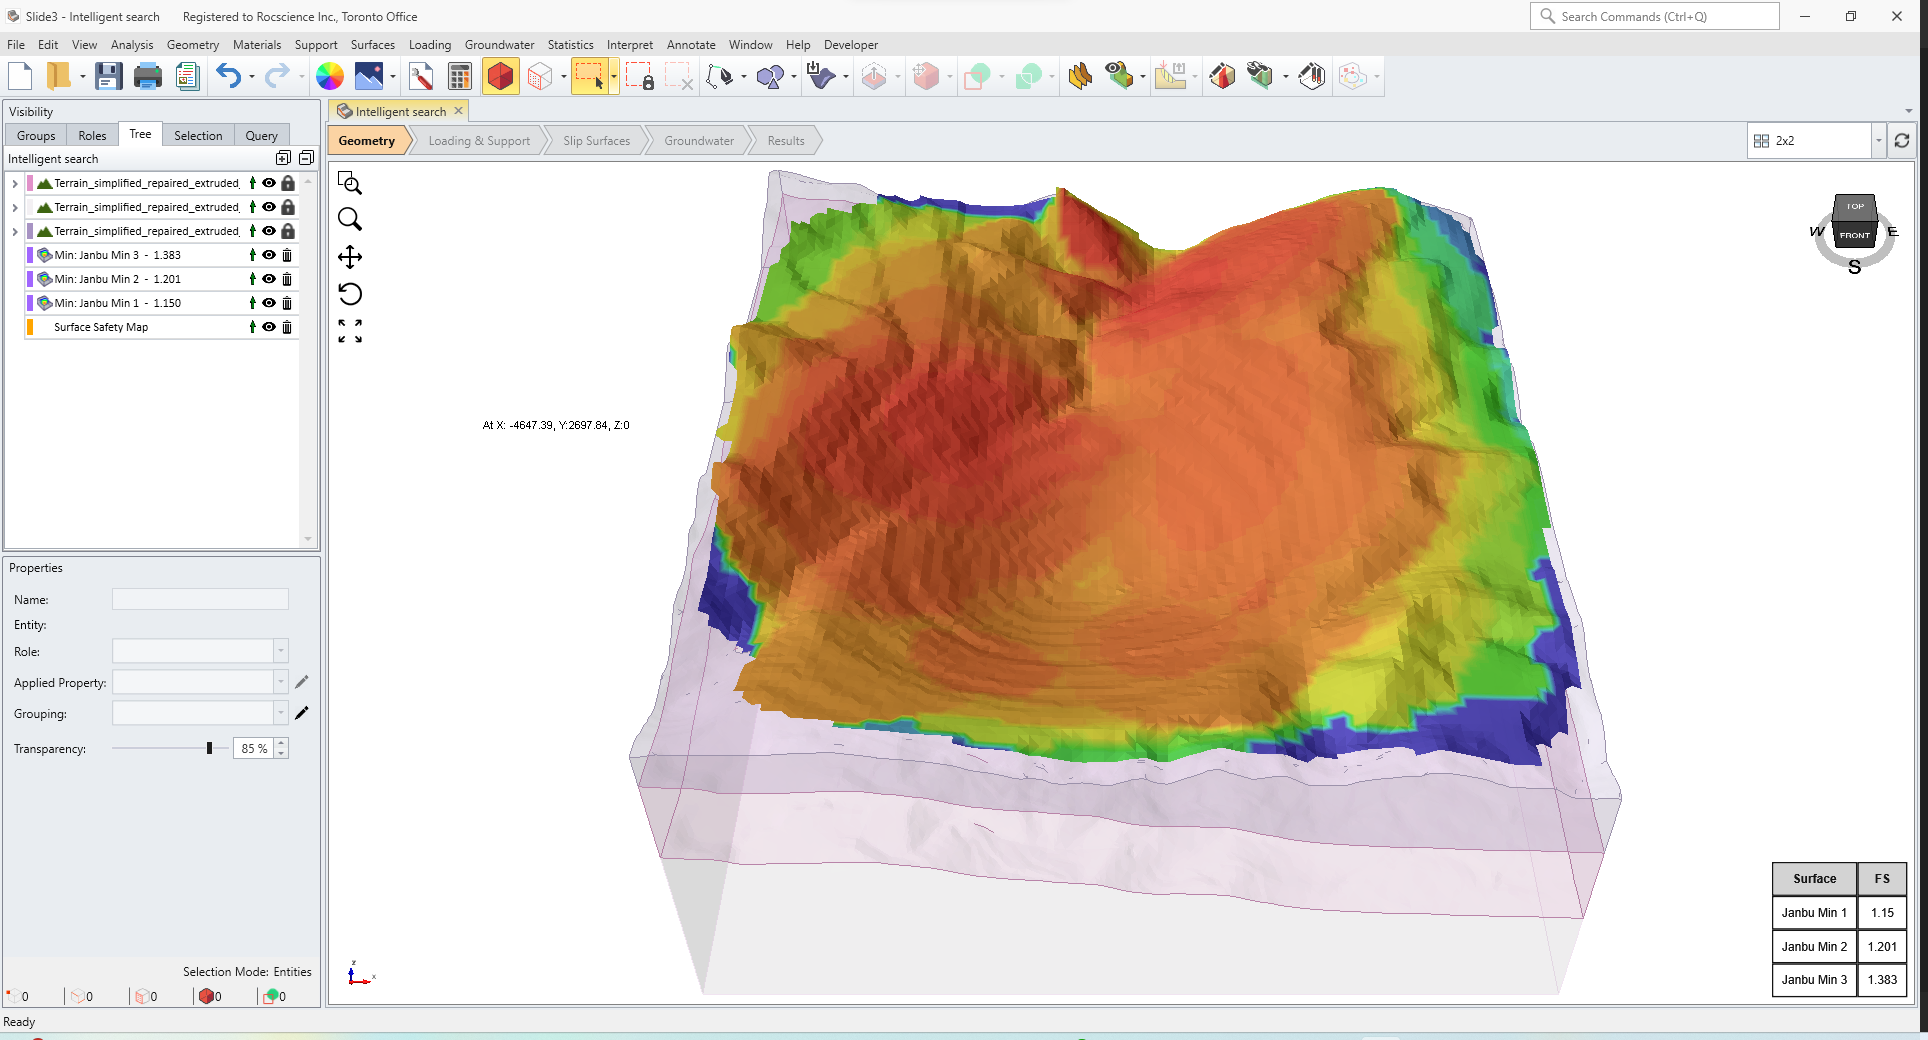
When the computation is finished, the results will automatically be displayed. The Janbu FS obtained by the Classic search in this example is close to 1.15.
Click on Interpret > Add Surface Safety Map. You can use this to see the safety of different areas of the model.
3.0 Improving the Search
It appears that there are some distinct regions on this model that we may want to look at more closely, since they are not represented among the final displayed surfaces.
To get a clearer picture of critical regions on the model and to automate our search of these regions we can use Regions of Interest tools and Intelligent Search, respectively.
3.1 Regions of Interest
- Select Surfaces > Slip Surface Options.
- Toggle Surface Generation Method to Intelligent search.
- You will notice an option for Search Refinement. By default, this is set to Moderate
meaning that the search will use moderately thorough parameters during computation. If you select the Advanced search options expander you will see the input values that are used. More information on these values later in this tutorial.
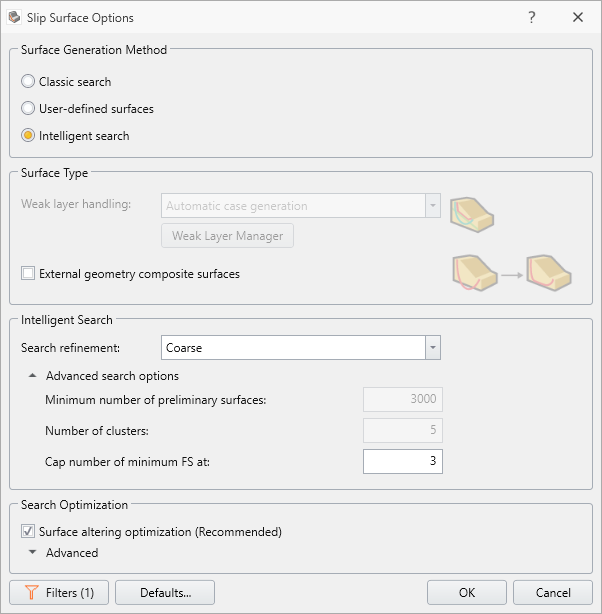
- Toggle Search Refinement to Coarse.
- Ensure that Surface Altering Optimization checkbox is ON.
- Click OK. Now ROI tools are enabled.
3.2 Compute ROI
Now we will look at the regions of interest determined during a preliminary computation.
- Select Surfaces > Regions of Interest > Regions of Interest Settings…
- Again, you will have the option to alter Search Refinement. The minimum number of preliminary surfaces changes depending on this setting. We will leave it as Coarse.
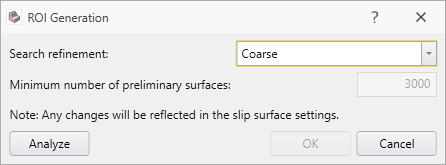
- Click Analyze.
- In the warning that appears, select Yes to continue. This warning is to inform us that existing results will not be retrievable if we continue.
- After compute, select OK. The ROI safety map has now been generated.
With the computation complete, you can see a safety map covering your model. Warmer colours represent more critical regions of interest.
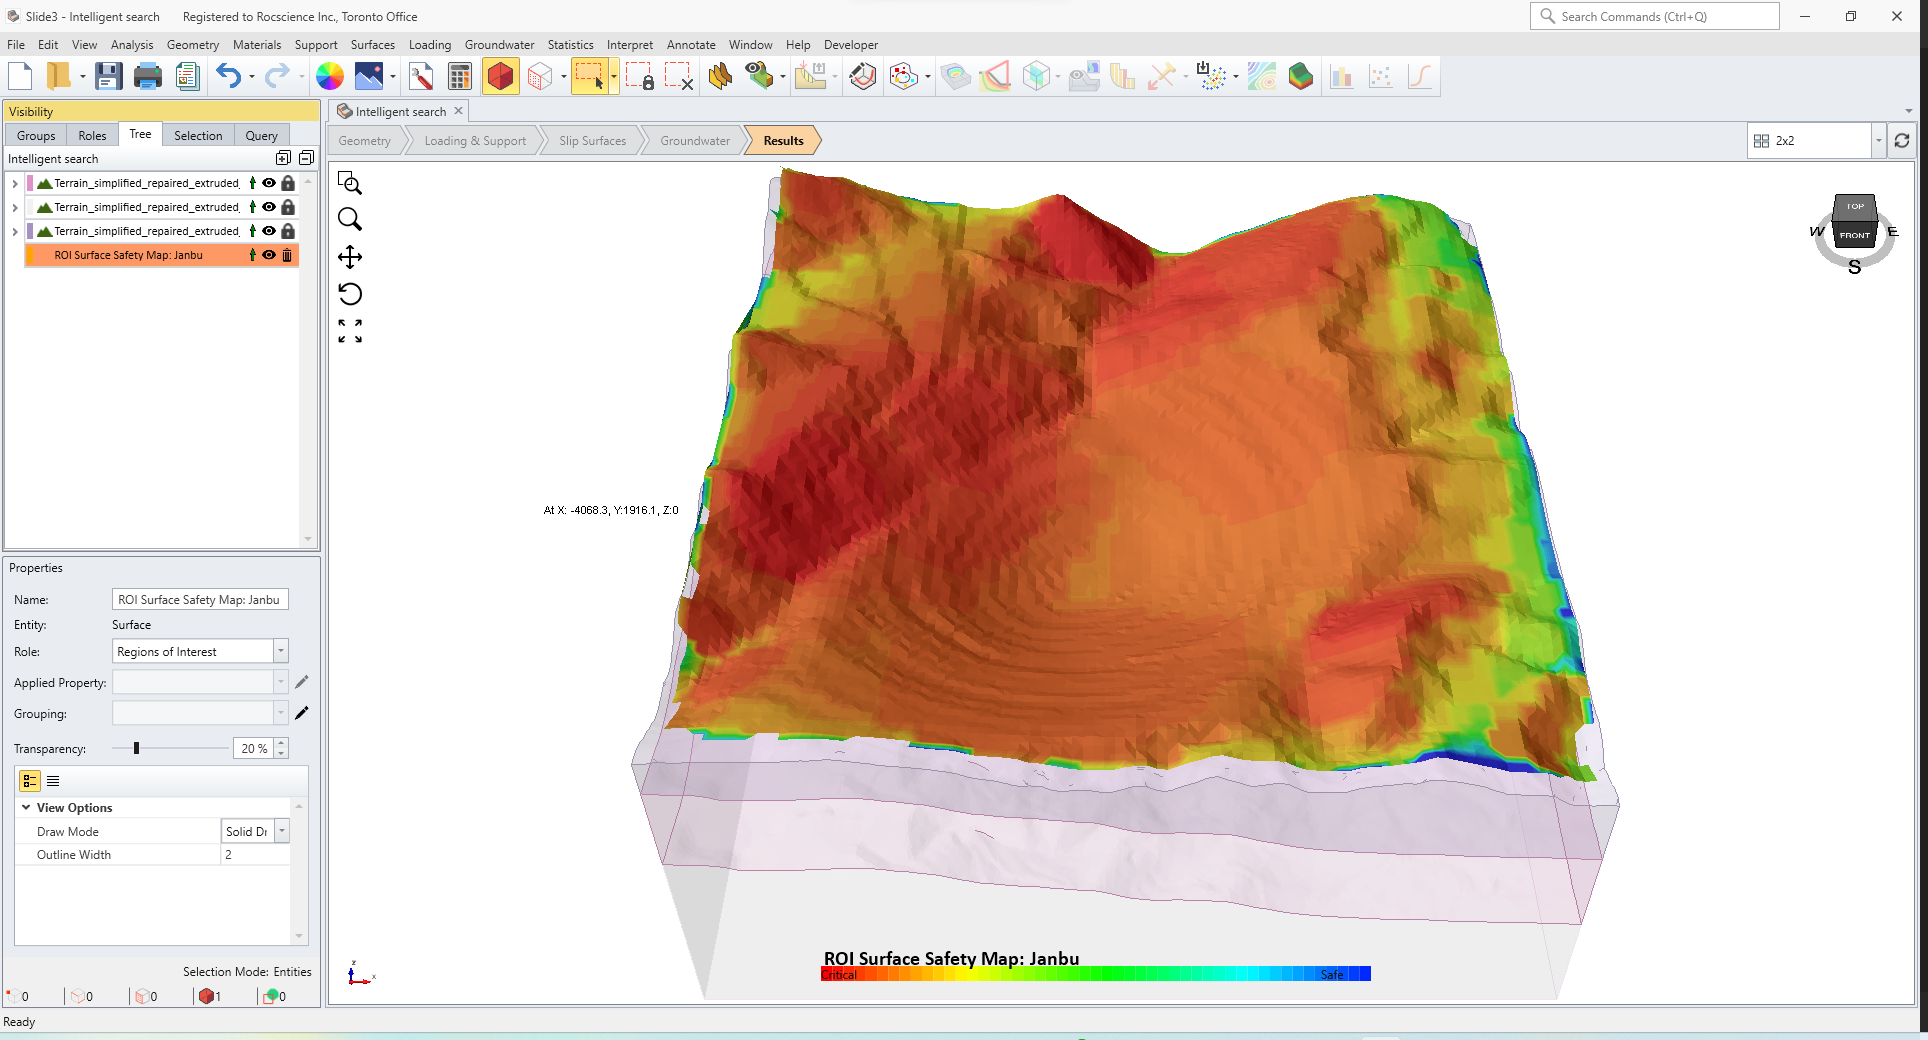
You will notice that the new ROI safety map contains more detail, particularly near the edges of the model.
4.0 Intelligent Search
- Save the model by selecting File > Save in the menu.
- Select Analysis > Compute in the menu to perform the analysis. Depending on your computer’s speed, this may take up to a few minutes.
The previously generated ROI safety map will be removed from the tree but you can add the newly computed one by going to Results > Load Computed Regions of Interest.
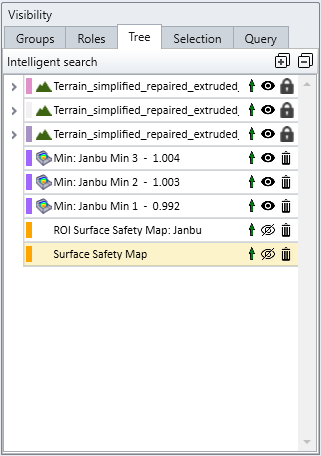
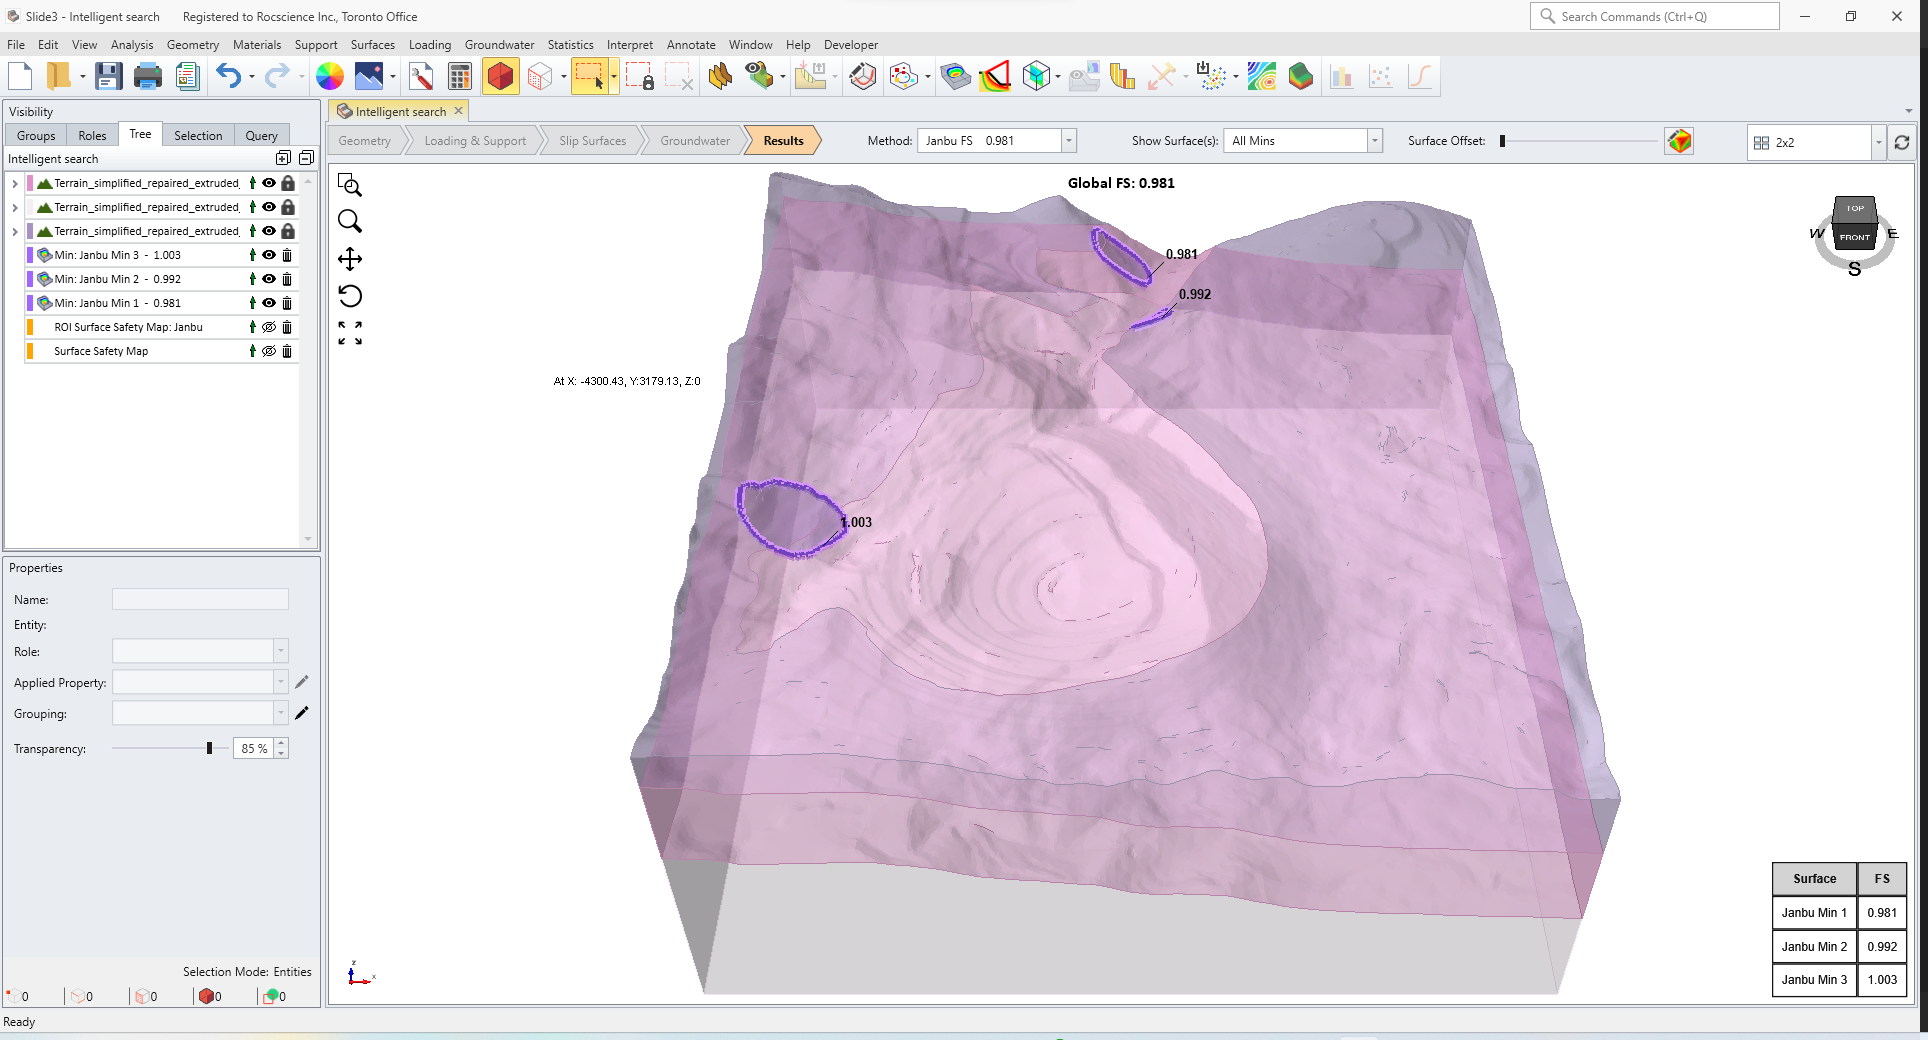
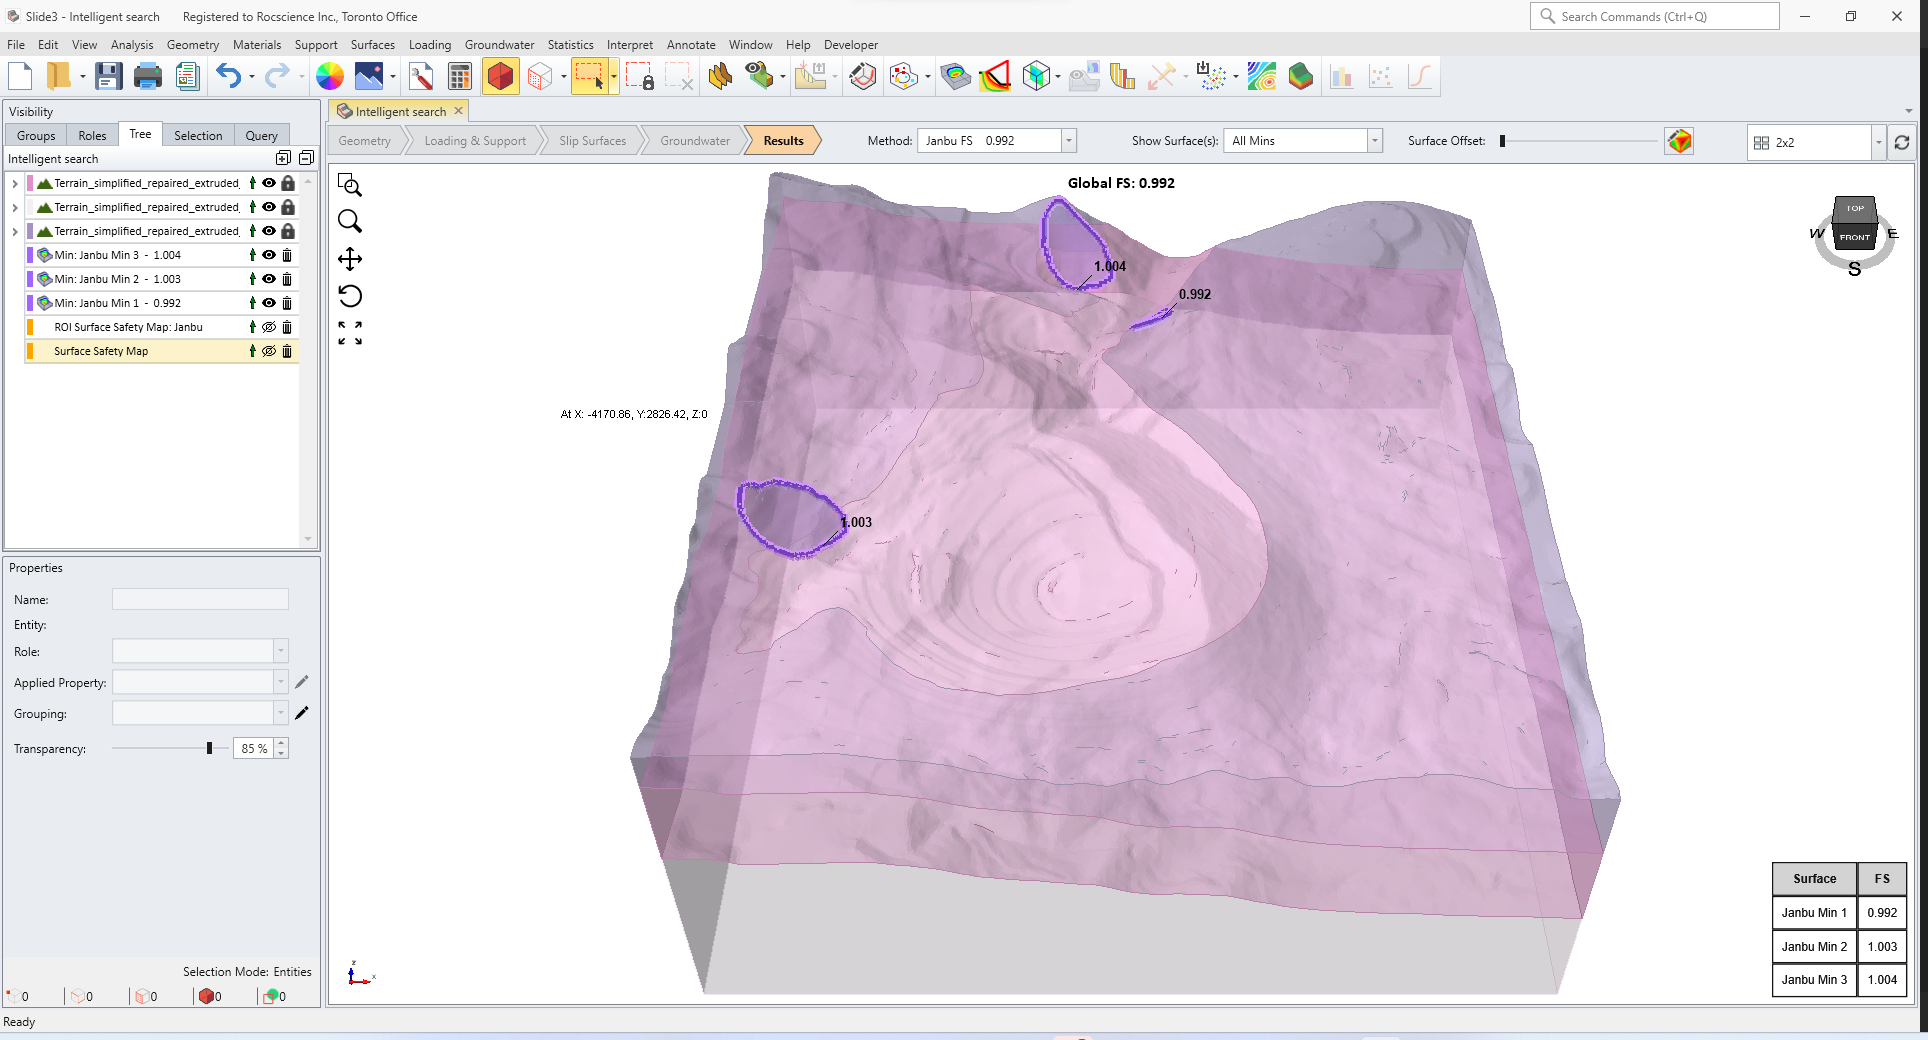
The results of the search will display 3 slip surfaces, with one slip surface yielding a FOS less than 1.
4.1 Search Refinement
As mentioned above, you can easily alter the thoroughness of your search using the Search Refinement setting. In advanced search options, the corresponding search parameters are as follows:
- Minimum number of preliminary surfaces: This represents the floor for preliminary surfaces, which are used to refine the regions of interest and ultimately the search space. Generally, increasing this value will increase the accuracy of your ROI safety map. The number of preliminary surfaces scales according to the size of the search space so changing this value may not change the number of preliminary surfaces, which you will be able to see in the compute dialog.
- Number of clusters: This is the number of search clusters. Increasing this value will facilitate more local searches, and therefore improves confidence that you have found the true minimum slip surface. Increasing this value increases compute time in exchange for allocating more resources to your search.
There is also the following display option:
- Cap number of minimum FS at: This sets the ceiling for the number of slip surfaces displayed in modeler upon completion of computation.
Search refinement provides preset combinations of these parameters for ease-of-use, but you can select User Defined, and set each of these parameters to your liking. For this example, we will use the Fine preset.
- Select Surfaces > Slip Surface Options.
- Change search refinement to Fine. Click OK.
- Select Analysis > Compute.
Upon completion of computation, you will again see 3 slip surfaces, but now two slip surfaces have a FOS under 1. The increase in search refinement improved our results.
