4 - Support
1.0 Introduction
This tutorial demonstrates the various ways of modelling support to increase the wedge Factor of Safety. All of the methods of modelling support in SWedge simply represent different ways of applying a force to a wedge. These methods include:
- Bolts can be added with the Add Bolt option.
- Shotcrete can be applied with the Shotcrete option.
- An average support or loading pressure can be applied with the Pressure option.
- Forces can be applied with the External Force option.
Topics Covered in this Tutorial
- Bolts
- Shotcrete
- Pressure
- External Force
- Sensitivity Analysis
Finished Product:
The finished product of this tutorial can be found in the Tutorial 04 Support.swd7 file, located in the Examples > Tutorials folder in your SWedge installation folder.
2.0 Creating a New File
- If you have not already done so, run the SWedge program by double-clicking the SWedge icon in your installation folder or by selecting Programs > Rocscience > SWedge > SWedge in the Windows Start menu.
When the program starts, a default model is automatically created. If you do NOT see a model on your screen:
- Select: File > New

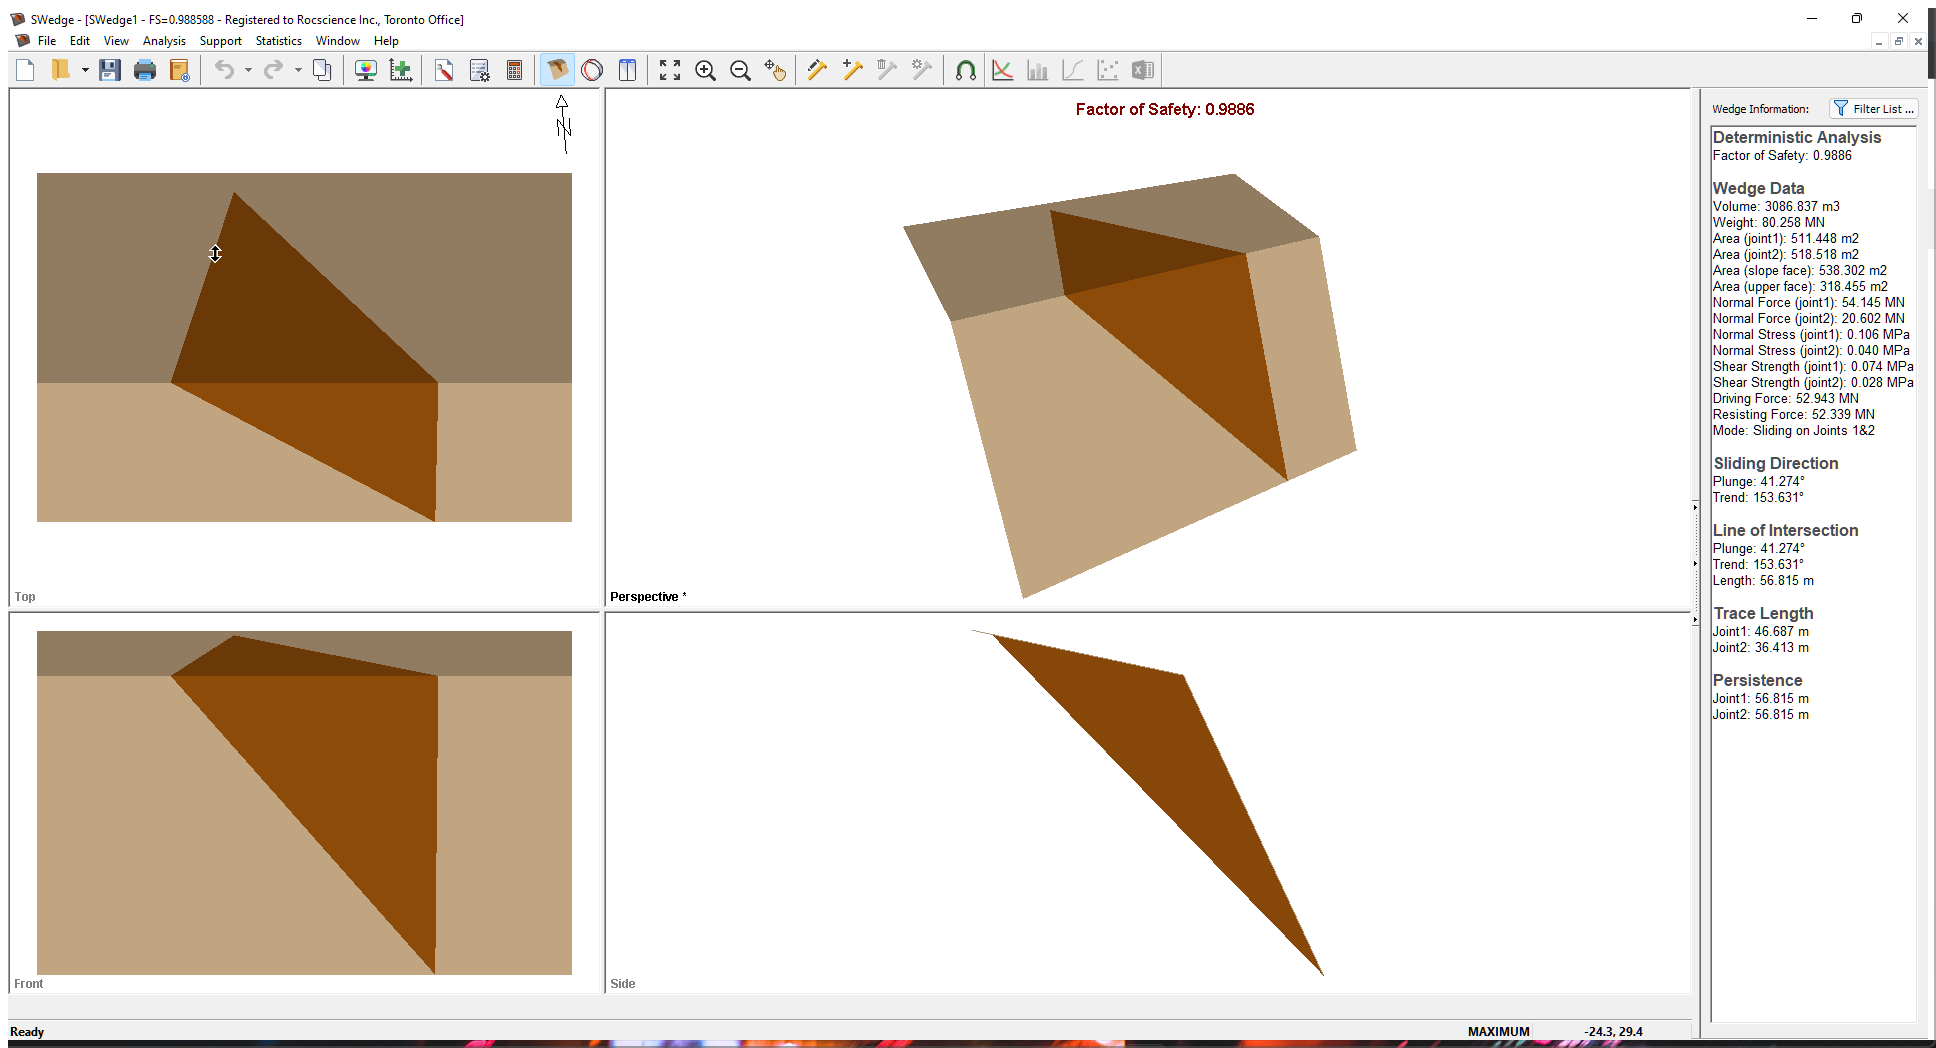
Whenever a new file is created, the default input data forms valid slope geometry, as shown in the image below.
If the SWedge application window is not already maximized, maximize it now so that the full screen is available for viewing the model.
Notice the four-pane, split-screen format of the display, which shows Top, Front, Side and Perspective views of the model. This view is referred to as the Wedge View. The Top, Front and Side views are orthogonal with respect to each other (i.e., viewing angles differ by 90 degrees.)
3.0 Model
3.1 PROJECT SETTINGS
Let's start by setting up the project in the Project Settings dialog.
- Select: Analysis > Project Settings

- Select the General tab.
- Make sure the Analysis Type is Deterministic.
- Make sure Units is set to Metric, stress as MPa.
- Click OK.
3.2 INPUT DATA
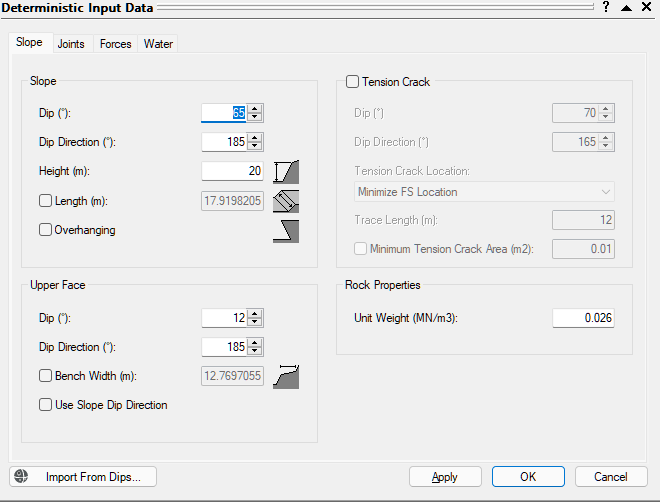
Now let’s define the slope and joint properties in the Input Data dialog. To open the dialog:
- Select: Analysis > Input Data

- Select the Slope tab.
- Set Slope Height (m) = 20.
- Keep all other parameters as is.
- Click OK.
4.0 Adding Bolts
We'll start by adding a bolt to the wedge using the Add Bolt option.
4.1 BOLT PROPERTIES
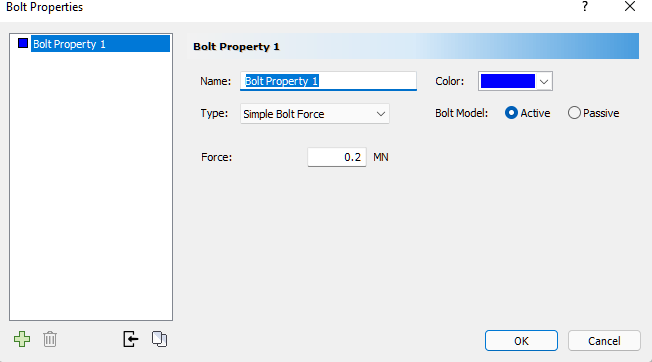
We first need to set up bolt properties using the Bolt Properties dialog.
- Select: Support > Bolt Properties

- Select Bolt Property 1.
- Set Type = Simple Bolt Force.
- Set Bolt Model = Active.
- Set Force = 0.2.
- Click OK.
4.2 ADDING A BOLT
Next, we'll add the bolt to the wedge using the Add Spot Bolt dialog.
- Select: Support > Add Spot Bolt

- Mouse over the Wedge View so the cursor is over wedge on the slope face.
- When the cursor changes from
 to
to  , click the left mouse button at a point on the wedge where you want the bolt installed (e.g., on the slope face).
The Add Spot Bolt dialog opens, allowing you to modify the geometry and set up properties for the bolt. - Keep Orientation = Trend / Plunge.
- Set Trend = 5.
- Set Plunge = 25.
- Click OK.
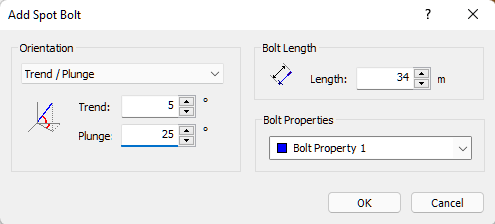
A computation of all the wedge combinations occur. Each wedge includes a bolt of Bolt Property 1 with a Trend / Plunge of 5/25. After computation, notice that the minimum Factor of Safety wedge has changed from 0.9886 to 1.0087.
Repeat the above steps to add a few more bolts to the wedge with larger bolt capacities and note the effect on the Factor of Safety.
TIP: Note that the colour of the bolt on the model matches the colour of its Bolt Property in the Bolt Properties dialog.
4.3 DELETING BOLTS
You can delete bolts from a wedge using the Delete Bolt option.
To delete one or more bolts from a wedge:
- Select: Support > Delete Bolt

- Mouse over the wedge on the Top, Front, Side, or Perspective pane.
Note that the cursor changes to a box. - Place the cursor over the bolt that you want to delete.
The bolt changes colour to indicate it's selected. - To delete the selected bolt, click the left mouse button.
Note that a new Factor of Safety is immediately calculated. - Repeat the steps above to continue deleting bolts.
- To exit the Delete Bolt option, press the ESC key.
To delete ALL bolts at once:
- Select: Support > Delete Bolt

- Enter the asterisk (*) character on the keyboard.
4.4 EDITING BOLTS
You can edit the properties of a bolt using the Edit Bolt option.
- Select: Support > Edit Bolt

- Mouse over the wedge on theTop, Front, Side, or Perspective pane.
Note that the cursor changes to a box. - Place the cursor over the bolt that you want to edit.
The bolt changes colour to indicate it's selected. - Click the left mouse button to open the Edit Spot Bolt dialog.
- Edit properties of the bolt the same way you did when adding the bolt above.
- Click OK.
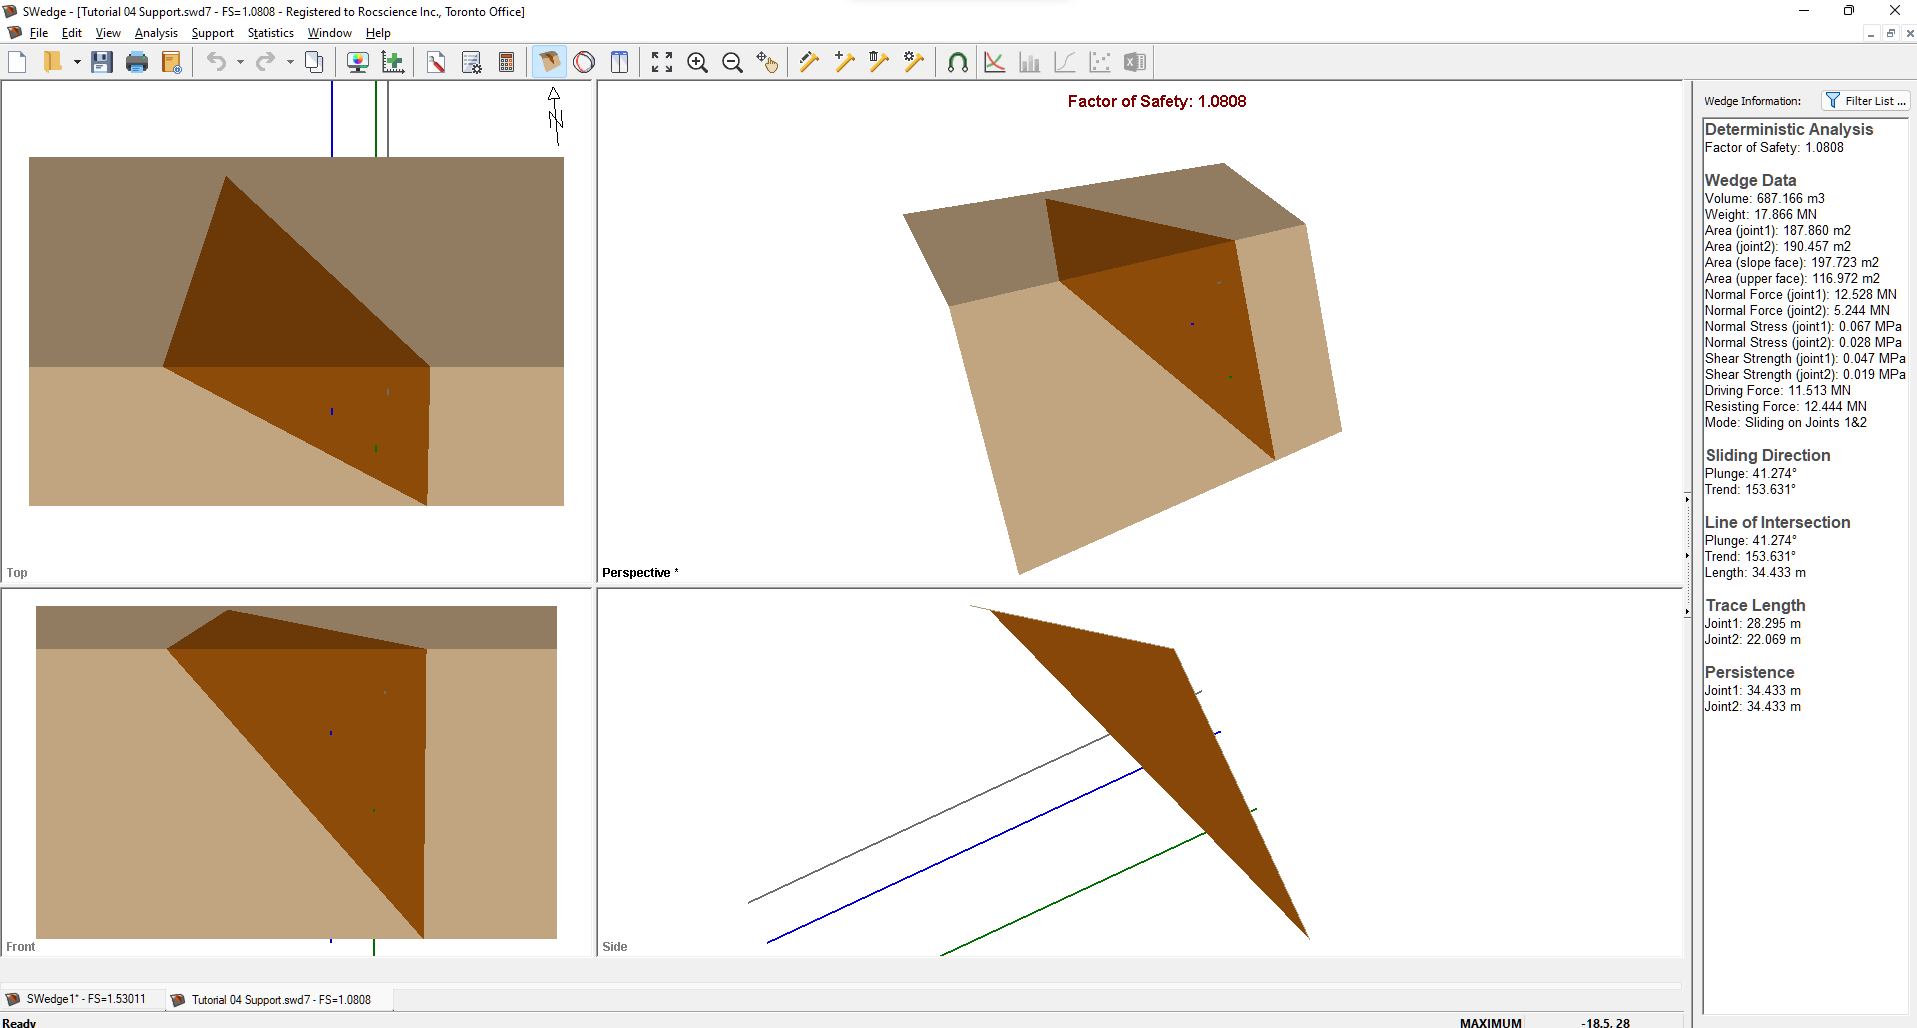
4.5 VIEWING BOLT PROPERTIES IN THE INFO VIEWER
You can view a list of all the bolts in a model and their properties in the Info Viewer. To open the Info Viewer:
- Select Analysis > Info Viewer


4.6 VIEWING BOLTS
It is useful to note that, if you move the wedge out of the slope after adding bolts, the bolts stay “in” the slope and are completely visible. This allows you to examine the bolt installation in more detail.
To move the wedge out of the slope:
- Click and drag the wedge with the left mouse button.
5.0 Adding Shotcrete
You can add shotcrete support to a wedge model using the Shotcrete option. To open the Shotcrete dialog:
- Select: Support > Shotcrete

- Select the Shotcrete (Slope Face Only) check box.
- Set Thickness (m) = 0.1.
- Set Shear Strength (MPa) = 1.
- Click OK to re-compute the analysis.

Notice that the addition of the shotcrete layer has increased the Factor of Safety from 1.0808 to 1.5983.
TIP: To perform a parametric analysis and view the effect of different Thickness and Shear Strength parameter values, you can click the Apply button to re-compute the analysis without closing the dialog.
6.0 Pressure Support
Next, we'll look at adding support to a wedge using the Pressure option. Before continuing, delete bolts and shotcrete from the model following instructions in the sections above.
- To open the Pressure dialog, select Pressure on the Support menu.
- Select the Slope Face check box to apply pressure to the slope face only.
By default, the direction of the applied pressure is normal to the slope face. - We want to apply normal pressure, so keep Trend = 5 and Plunge = 25.
- Set Pressure (MPa) = 0.01.
- Keep Model = Active.
- Click OK.
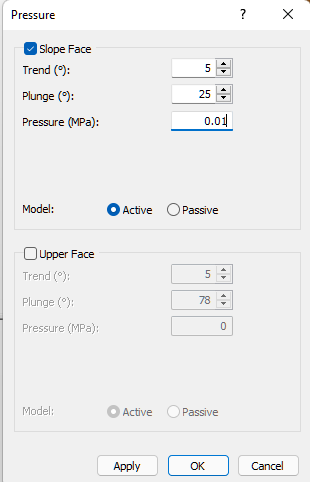
Note that the Factor of Safety is increased to 1.197.
7.0 Sensitivity Analysis
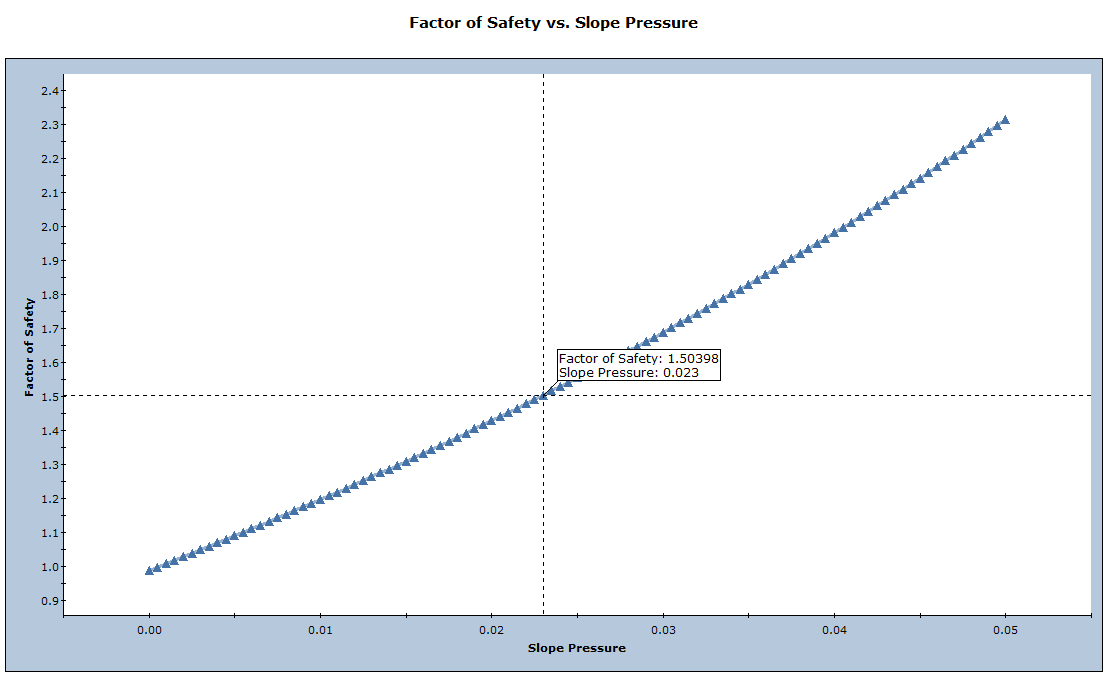
A Sensitivity analysis in SWedge allows you to quickly determine the effect of any input variable on the Factor of Safety. The feature is especially useful for determining support requirements. In this tutorial, we'll demonstrate this by using a Sensitivity analysis to determine the support Pressure required to achieve a Factor of Safety of 1.5.
To conduct a Sensitivity analysis:
- Select: Analysis > Sensitivity

- Select the first check box in the dialog and select Slope Pressure from the drop-down.
- Set From = 0 and To = 0.05.
- Click OK.
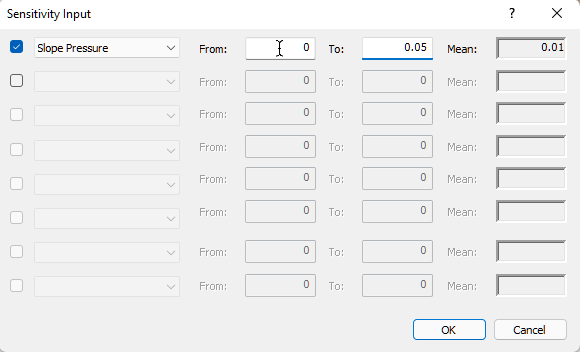
A Sensitivity chart is displayed, plotting the Factor of Safety vs. Slope Pressure.
- Right-click in the chart and select Sampler > Show Sampler from the popup menu.
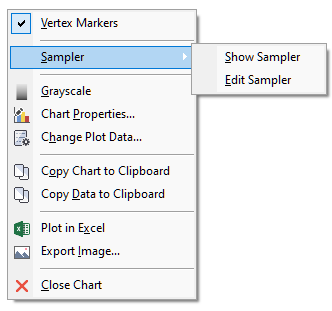
The Sampler appears as a horizontal line on the plot.
- Click and drag the Sampler until you obtain a Factor of Safety of approximately 1.5.
The corresponding Slope Pressure of 0.023 MPa is also displayed on the plot.
- Close the Sensitivity plot.
- Select Pressure on the Support menu to re-open the Pressure dialog.
- Set Pressure (MPa) = 0.023.
You should obtain a Factor of Safety of approximately 1.5.
8.0 Equivalence of Support Methods in SWedge
We will now demonstrate the equivalence of the various support methods in SWedge.
In the Wedge Information Panel in the Sidebar, note that Area (slope) = 198 m2. This is the area of the wedge face on the slope. If we multiply this area by Pressure (MPa) = 0.023, we obtain a force of about 4.55 MN. Therefore, if we add a single, simple force bolt with Force (MN) =4.55, we will get a Factor of Safety of 1.5.
The slight difference in values is due to the fact that we did not obtain a very precise value of Pressure from the Sample option on the Sensitivity plot. Also note that, in both cases. support Model was set to Active.
9.0 External Force
Finally, we'll demonstrate that an External Force of 4.55 MN, applied normal to the slope (Trend/Plunge = 5/25), will also give us a Factor of Safety of 1.5.
- Select Pressure on the Support menu.
- In the Pressure dialog, deselect the Slope Face check box.
- Open the Input Data dialog by selecting Analysis > Input Data

- Select the Forces tab.
- Add an External Force as shown in the figure below.

Deterministic Input Data - Click OK.
The Factor of Safety is confirmed as 1.50.
This concludes the tutorial.