“Joints Can Change Everything”; Here’s How to Better Model Discrete Fracture Networks in RS3
Capturing the behavior of joints is critical for accurately predicting rock mass stability. During a past webinar, RS3 Product Manager Dr. Sina Moallemi shared helpful knowledge about the program’s Discrete Fracture Network (DFN) tool. With it, engineers can define and simulate the natural planes of weakness in rock masses — joints — that influence failure mechanisms in slopes and tunnels.
Here, we’ll cover how you can define and visualize realistic joint networks, inspect joint networks with the cross-section tool, and integrate these elements into your workflow efficiently. Whether you’re analyzing slope stability or tunnelling in jointed rock masses, this practical guide will help you make the most of DFN.
Visualizing Fracture Networks in Real Time
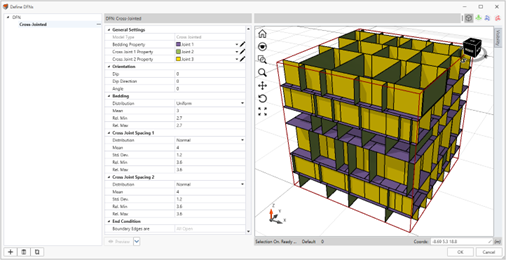
In the webinar, Dr. Moallemi demonstrated how users can preview joint networks in real time and adjust spacing, orientation, and joint length interactively. This ensures that every joint configuration aligns with the specific characteristics of the rock mass being modelled to give you greater control and clarity.
Real-time visualization makes it easier to fine-tune DFN setups. Because you can immediately see how adjustments affect the model, you can catch potential issues early and streamline the process before moving on to analysis.
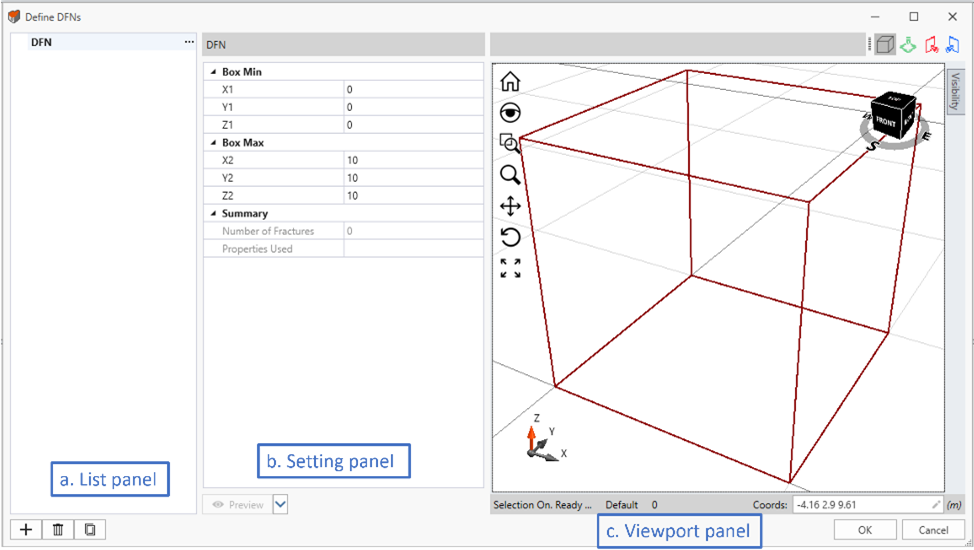
“When you open the Define DFN tool in RS3, you’ll see three panels: one to define the DFN set (a), one to adjust parameters (b), and one to visualize the distribution (c).” (8:26-9:25)
Using the Cross-Jointed DFN Tool to Inspect Joint Networks
Cross-jointed DFNs in RS3 provides a better way to visualize and inspect complex joint networks. Dr. Sina Moallemi demonstrated how to define and move cross-sections within models, so you can get a detailed look at the distribution and interaction of joints within the rock mass. This tool ensures that even the most intricate joint networks are correctly configured before proceeding with analysis.
Examining cross-sections is particularly useful for identifying issues in areas where joints intersect or where their spacing and orientation could impact the model’s behavior. This additional layer of insight helps you verify the accuracy of their configurations and refine set-ups to align with real-world conditions.
“In case your DFN is very complicated and you want to see more detail inside, we added a tool that lets you define a cross-section and move it to see what’s exactly happening inside the DFN you created.” (21:14-21:33)
Slope Stability Analysis Redefined by DFN
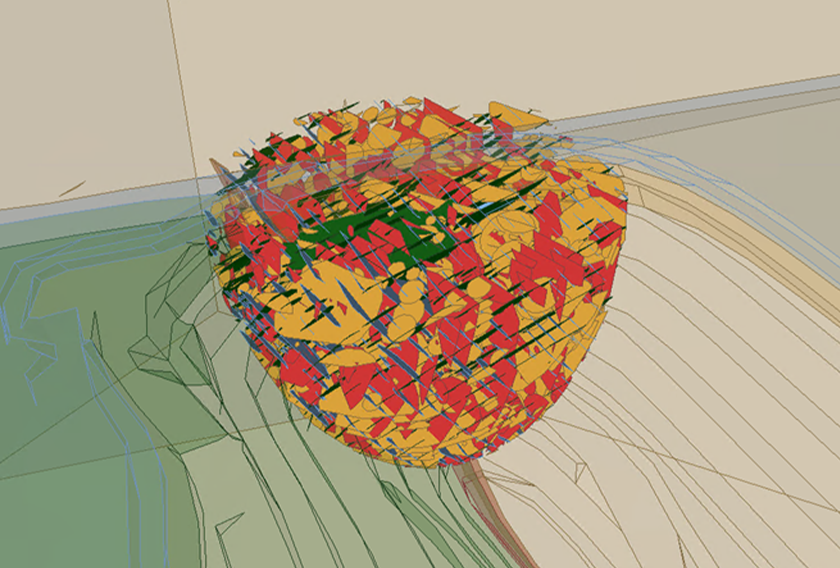
In an example of an open-pit slope, Dr. Moallemi shared a model without joints that had a critical safety factor (SRF) of 2.86, with failure occurring through the rock itself. By incorporating DFN, the SRF dropped to 1.9, and the failure mechanism shifted to sliding along the joint surfaces.
By accurately representing planes of weakness, you can better predict failure patterns and design slopes that account for actual geological behavior, avoiding overly optimistic safety factors.
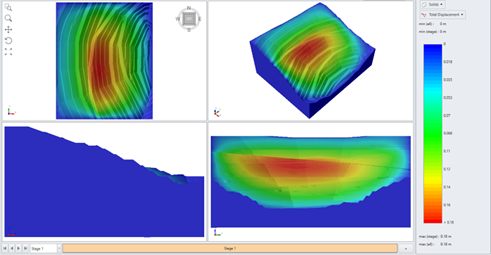
“You can see the mode of failure has completely changed. Now it’s sliding along the joint planes.” (36:13-36:33)
Understanding Displacement and Stress for Tunnelling
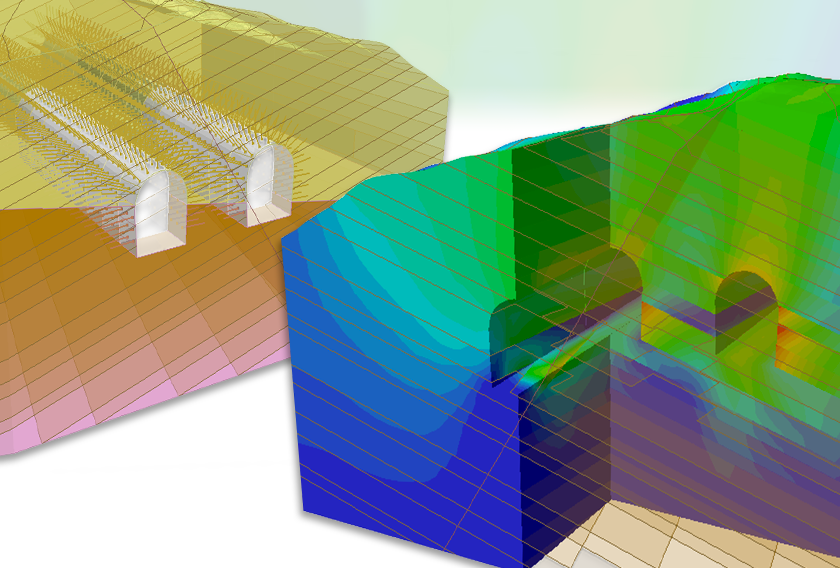
For tunnelling projects, DFN offers insights into how jointed rock masses respond to excavation. A case was shown where DFN revealed areas of maximum displacement near joints intersecting the tunnel face. With this data, you can optimize the placement of support elements such as bolts and liners and improve stability throughout the excavation process.
Beyond displacement, DFN can show you a detailed analysis of shear and tensile failures along joints, which can help you refine designs to mitigate failure risks, particularly in complex tunneling scenarios where joints play a dominant role in deformation and stress distribution.
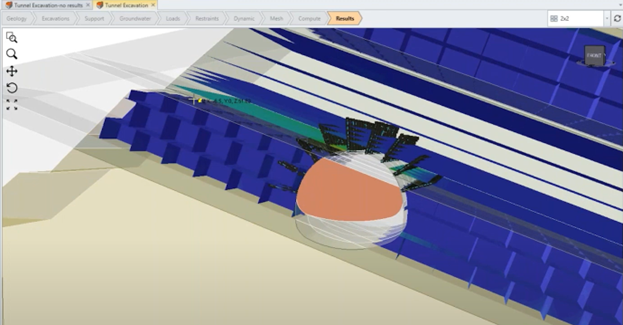
“We see maximum displacement where the parallel joints are crossing the tunnel face.” (37:52-38:02)
Suggested Workflow for Efficient Modelling in RS3
Here’s a clear workflow from the webinar that you can use for accurate and efficient RS3 modelling:
- Start with geometry: Create your model directly in RS3 or import geometry from external sources. Use the built-in repair tools to identify and fix any defects in imported files.
- Assign materials: Define material properties using RS3’s comprehensive library for soils and rocks. The borehole manager can simplify this step by creating material layers based on borehole data.
- Divide all: Prepare the model for analysis by resolving intersections between geometry volumes. This step is crucial for accurate meshing.
- Set boundary conditions: Depending on your analysis, apply solid, seepage, or dynamic boundary conditions to the model.
- Generate the mesh: Use tetrahedral elements (4-node or 10-node options) to create the finite element mesh, tailored to your project’s needs.
- Add the DFN: Introduce the DFN only after the geometry, materials, and Divide All steps are complete. Adding DFN too early can create unnecessary complications and increase computation times.
- Run the analysis: Perform computations, such as shear strength reduction (SSR) or dynamic simulations, and review the results to evaluate your model’s behavior.
“The best time to add DFN is after everything else is set up... If you add it too early, the Divide All process can take longer.” (30:19-30:46)
DFN Sets the Stage for Smarter Analysis
Our webinar led by Dr. Moallemi gave helpful advice on how you can use RS3’s DFN tool for modelling rock masses. By defining joint networks with detailed parameters, using real-time visualization tools, and strategically integrating DFN at the right stage of your workflow, you can more confidently tackle slope and tunnel analysis.